Setting up SnapRAID on Ubuntu to Create a Flexible Home Media Fileserver

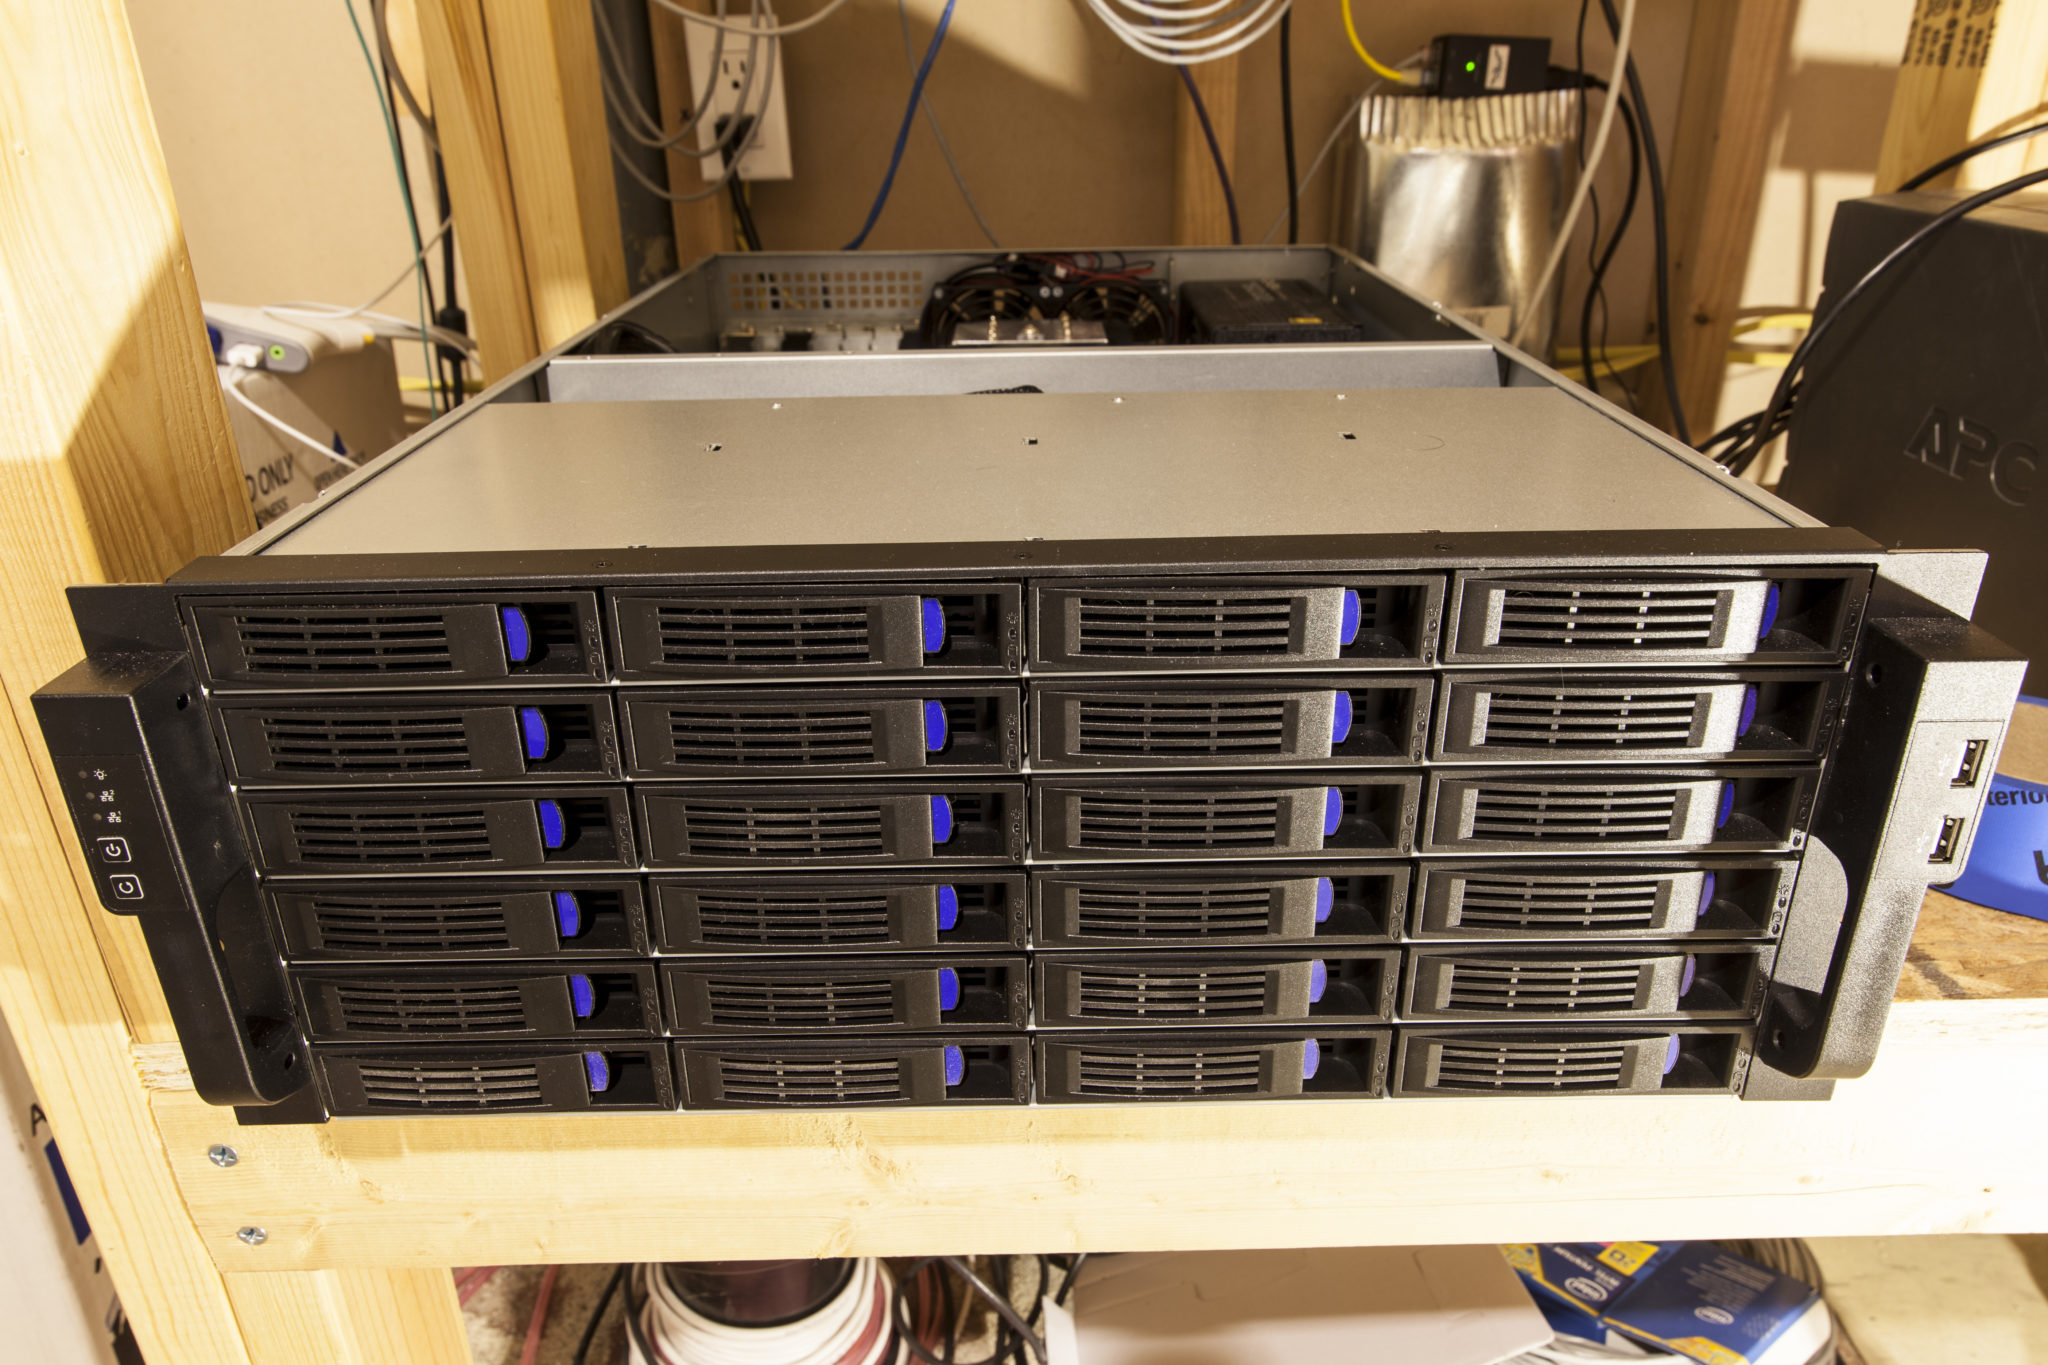 Home Media Fileserver in Norco 4224 Case
</div>I have SnapRAID setup to create a super flexible, reliable bulk media server. I have used SnapRAID for years across numerous versions of Ubuntu and a plethora of hardware. SnapRAID has been so reliable that I have updated hardware four times since I originally set it up, migrated through many versions of SnapRAID, added many data disks, added parity levels, and replaced disks all without issue. All the while, it’s been super flexible and an awesome way to manage my bulk media. I currently have a ridiculously over the top server that you can read more about here. On it, I use three parity disks and 21 data disks.
Note: I have built a newer version of this server that is even more ridiculous.
The first thing I do after any new install is update the system, and install my base packages.
1
apt-get update && apt-get dist-upgrade -y && reboot
After the reboot, let’s keep installing the packages we will need to build SnapRAID.
1
2
sudo -i
apt-get install gcc git make -y
Finally, let’s install it.
1
2
3
4
5
6
7
8
9
10
11
cd
wget https://github.com/amadvance/snapraid/releases/download/v12.4/snapraid-12.4.tar.gz
tar xzvf snapraid-12.4.tar.gz
cd snapraid-12.4/
./configure
make
make check
make install
cd ..
cp ~/snapraid-12.4/snapraid.conf.example /etc/snapraid.conf
cd ..
Next, let’s cleanup.
1
rm -rf snapraid*
Next, I’m going to partition the disks, so I need to grab a couple packages.
1
apt-get install parted gdisk
Let’s partition one, and copy the structure to the other disks.
1
2
3
4
5
6
7
8
9
10
11
parted -a optimal /dev/sdb
GNU Parted 2.3
Using /dev/sdb
Welcome to GNU Parted! Type 'help' to view a list of commands.
(parted) mklabel gpt
(parted) mkpart primary 1 -1
(parted) align-check
alignment type(min/opt)  [optimal]/minimal? optimal
Partition number? 1
1 aligned
(parted) quit
1
2
3
4
5
sgdisk --backup=table /dev/sdb
sgdisk --load-backup=table /dev/sdc
sgdisk --load-backup=table /dev/sdd
sgdisk --load-backup=table /dev/sde
sgdisk --load-backup=table /dev/sdf
Now, we will make a place to mount the disks. I mount them via /etc/fstab labeled by their device type and serial number as seen beloew. This makes the disk easier to identify in the event of a disk failure.
1
2
mkdir -p /disks/data/disk{1..4}
mkdir -p /disks/parity/1-parity
Setup a filesystem on each data disk (Note, I’m reserving 2% of the disks space so that the parity overhead can fit on the parity disk). You can set the reserved space to 0% if your parity disk(s) are all larger than your data disks (i.e. you have 6TB parity disks and 5TB data disks).
1
2
3
4
mkfs.ext4 -m 2 -T largefile /dev/sdb1
mkfs.ext4 -m 2 -T largefile /dev/sdc1
mkfs.ext4 -m 2 -T largefile /dev/sdd1
mkfs.ext4 -m 2 -T largefile /dev/sde1
Put a filesystem on the parity disk (here I’m reserving 0%, or letting it use the whole disk for parity).
1
mkfs.ext4 -m 0 -T largefile /dev/sdf1
Get the device type and serial numbers like this, then add them to your /etc/fstab.
1
ls -la /dev/disk/by-id/ | grep part1  | cut -d " " -f 11-20
It should give you output like this.
1
2
3
4
5
ata-HGST_HDN724040ALE640_PK2334PBHDYY0R-part1 -> ../../sdb1
ata-HGST_HDS5C4040ALE630_PL2331LAG90YYJ-part1 -> ../../sdc1
ata-HGST_HUS726060ALA640_AR31001EG1YE8C-part1 -> ../../sde1
ata-Hitachi_HDS5C3030ALA630_MJ0351YNYYYK9A-part1 -> ../../sdf1
ata-Hitachi_HDS5C3030ALA630_MJ1313YNGYYYJC-part1 -> ../../sdg1
Let’s create some directories to mount our new disks.
1
2
mkdir -p /disks/data/disk{1..4}
mkdir -p /disks/parity/1-parity
You use the above to add them to /etc/fstab
1
nano /etc/fstab
It should look something like this.
1
2
3
4
5
6
7
8
# SnapRAID Disks
/dev/disk/by-id/ata-HGST_HDN724040ALE640_PK2334PBHDYY0R-part1 /disks/data/disk1 ext4 defaults 0 2
/dev/disk/by-id/ata-HGST_HDS5C4040ALE630_PL2331LAG90YYJ-part1 /disks/data/disk2 ext4 defaults 0 2
/dev/disk/by-id/ata-HGST_HUS726060ALA640_AR31001EG1YE8C-part1 /disks/data/disk3 ext4 defaults 0 2
/dev/disk/by-id/ata-Hitachi_HDS5C3030ALA630_MJ0351YNYYYK9A-part1 /disks/data/disk4 ext4 defaults 0 2

# Parity Disks
/dev/disk/by-id/ata-Hitachi_HDS5C3030ALA630_MJ1313YNGYYYJC-part1 /disks/parity/1-parity ext4 defaults 0 2
As you may be able to see, the above shows the type of connection, in this case SATA, the Manufacturer of the disk, the part number of the disk, the serial number of the disk, and the partition we are using from the disk. This makes indentying disks in the event of a failure super easy.
Mount the disks after you add them to /etc/fstab
1
mount -a
Next, you’ll want to configure SnapRAID.
1
nano /etc/snapraid.conf
This is how I configured mine
1
2
3
4
5
6
7
8
9
10
11
12
13
14
15
16
17
18
19
20
21
22
23
24
25
26
27
28
parity /disks/parity/1-parity/snapraid.parity

content /var/snapraid/content
content /disks/data/disk1/content
content /disks/data/disk2/content
content /disks/data/disk3/content
content /disks/data/disk4/content

disk d1 /disks/data/disk1/
disk d2 /disks/data/disk2/
disk d3 /disks/data/disk3/
disk d4 /disks/data/disk4/

exclude *.bak
exclude *.unrecoverable
exclude /tmp/
exclude /lost+found/
exclude .AppleDouble
exclude ._AppleDouble
exclude .DS_Store
exclude .Thumbs.db
exclude .fseventsd
exclude .Spotlight-V100
exclude .TemporaryItems
exclude .Trashes
exclude .AppleDB

block_size 256
Next, we need to create the path that we mentioned above for our local content file.
1
mkdir -p /var/snapraid/
Once that’s complete, you should sync your array.
1
snapraid sync
Since moving to SnapRAID 7.x, the above mentioned script no longer works. I have revised the script to accommodate dual parity, and to integrate the changes in the counters.
Finally, I wanted something to pool these disks together. There are four options here (choose your own adventure). The nice part about any of these is that it’s very easy to change later if you run into something you don’t like.
1. The first option is mhddfs. It is super easy to setup and “just works”, but many people have run into random disconnects while writing to the pool (large rsync jobs where causing this for me). I have since updated my mhddfs tutorial with some new FUSE options that seems to remedy the disconnect issue. mhddfs runs via FUSE vs. a kernel driver for AUFS, so it’s not as fast as AUFS and it does have more system overhead.
2. The second option is to use AUFS instead. The version bundled with Ubuntu has some weirdness with deletion and file moves with both it’s opaque and whiteout files. It also does not support exporting via NFS.
3. The third option is to use AUFS, but to compile your own versions to support the hnotify option and allow for export via NFS. This is where I landed for a few years after trying both of the above for many months/years.
4. This is what I use Finally, a solution that performs well and is easy to use. MergerFS (the solution I’m currently using). This is a FUSE based solution, but it’s fast and has create modes like AUFS. It’s also easy to install and requires no compiling unlike AUFS to get it working. This is what I use now, and it’s great and actively developed.
After choosing one of the options above, you should now have a mount point at /storage that is pooling all of your disks into one large volume. You’ll still want to setup a UPS and SMART monitoring for your disks. Another thing I did was write up a simple BASH script to watch my disk usage, and email me if a disk gets over 90% used, so I can add another disk to the array.
Updating in the future
You may wonder…”Hmm, I installed this fancy SnapRAID a while back, but the shiny new version of SnapRAID just came out, so how do I update?” The nice thing about SnapRAID is that it’s a standalone binary with no dependencies, so you can upgrade it in place. Just grab the latest version, untar, and install.
1
2
3
4
5
6
7
wget https://github.com/amadvance/snapraid/releases/download/v12.4/snapraid-12.4.tar.gz
tar xzvf snapraid-12.4.tar.gz
cd snapraid-12.4/
./configure
make
make check
make install
You can check your version like this.
1
snapraid -V
Other Items:
If you would like to have encrypted SnapRAID disks, the following will go through that.